A programming language for the visual arts which can help any digital artist create complex animations and interactive installations
What’s new in Processing 3.5.4:
- changes:
- Don’t remove entries from Recent menu on Save As
- Use ctrl-page up/down for changing tabs on Windows
- Show error when .properties file is missing from a Library/Mode/Tool.
Read the full changelog
Processing is a powerful and fun to use programming language that was initially created to help coding enthusiasts learn the basics of programming but since then, it has evolved into something much more elaborate.
Now it is an open source development tool which emphasizes on the visual representation of the code, targeting both advanced users and professionals. Since its initial relwho want to experiment with code and is still hard at work today.
User-friendly interface
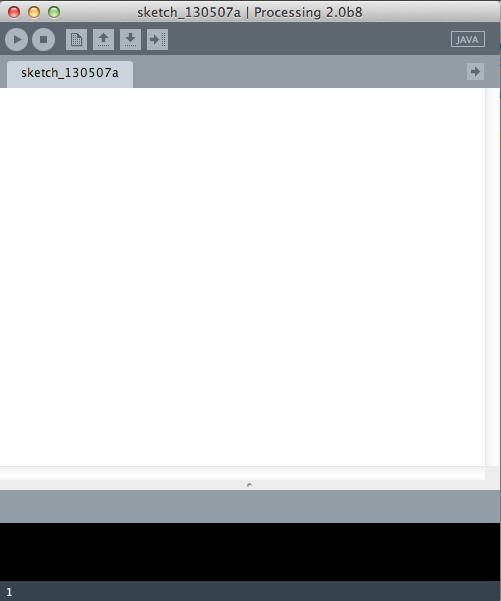
Since Processing was initially meant to be a code sketchbook, it retains the advantages of simplicity when it comes to its interface. The main window is comprised from commonly found elements in any code editor, namely a toolbar, project tabs, text editor, message area and a console.
Everything is kept clean, almost minimalistic and whenever you finish a portion of code and want to test it out, a simple click of the ‘Run’ button brings out a display window in which you can view or interact with your creation.
Sketches and sketchbooks
As mentioned earlier, Processing was born with the intent to help you learn and practice the basics of programming and despite its evolution into a complete tool, it retains the ‘sketch’ term and uses it to refer to a project. Basically, even if you have two thousand lines of code, you still call it a sketch.
This is worth mentioning because for every project that you create Processing generates a folder with the project name where it stores files that are integrated into the project, making it very easy for you to move a project from one place to another without any kind of concerns, just like you would with a sketch.
Preview your projects
A feature that is very helpful and makes the entire process more enjoyable is the presence of the preview window which pops up every time you run your code. For every interactive animation you create you can check it out and spot any inconsistency before you get too far ahead in the project.
Processing also supplies three built-in renderers that are used to draw the shapes defined by the code. They can draw 2D or 3D shapes and come with an additional advantage. Meaningly, if your system supports OpenGL, the renderers are enhanced and offer higher quality processing.
A programming language for visual arts
With the above to consider and much more to discover about Processing, it’s safe to say that the simplicity of this tool can definitely be used to create complex and great looking visuals projects.
Вкладки, несколько файлов и классы
Писать большую программу в одном файле бывает неудобно. Когда скетч Processing вырастает до сотен и тысяч строчек, управиться со всем этим может помочь разбитие кода на отдельные модульные фрагменты. Processing управляет файлами при помощи «скетчбука», и каждый скетч может иметь несколько файлов, управляемых при помощи вкладок.
Для управления этими файлами предназначена стрелочка справа от меню вкладок в PDE. Кликните на нее, чтобы открыть меню с опциями для создания новой вкладки, переименования текущей вкладки и удаления текущей вкладки. Вкладки предназначены для более опытных пользователей – именно поэтому меню для управления вкладками намеренно сделано менее заметным.
Для опытных пользователей
Когда запущена программа с несколькими вкладками, код группируется вместе, а классы в других вкладках становятся вложенными классами. Поскольку это вложенные классы, они не могут иметь статических переменных. Поэтому просто помещайте статические переменные вне классов (если размещать их таким образом, вам даже не придется явно указывать, что они статические). Если вы не хотите, чтобы ваш код был вложенным классом, создайте вкладку с суффиксом «.java» – благодаря этому она будет интерпретироваться как «чистый и беспримесный» код Java. Кроме того, в отдельных вкладках нельзя использовать статические классы. Впрочем, если вы так все же сделаете, вам нужно будет передать объекту в этой вкладке объект PApplet, чтобы в нем заработали PApplet-функции вроде line(), loadStrings(), saveFrame() и т.д.
…Processing принимает данные
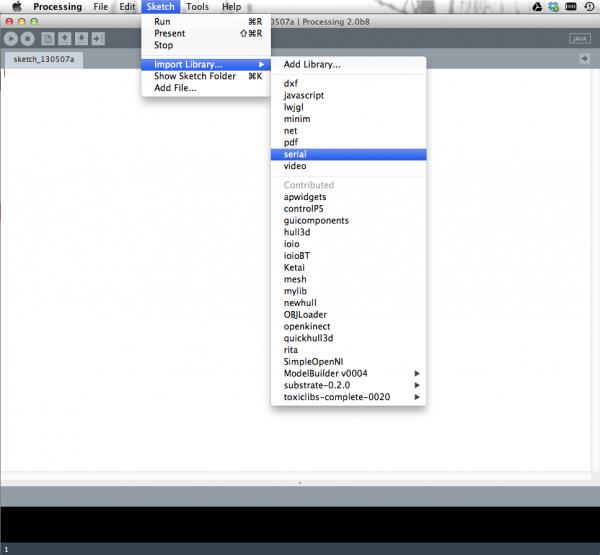
Напоминает Arduino IDE, правда? При разработке Arduino IDE очень активно использовался Processing (именно в подобном и проявляется прелесть и мощь open-source проектов!). После открытия скетча наш первый шаг — импортировать библиотеку Serial library. Идем в Sketch->Import Library->Serial, как это показано ниже:
В верхней части вашего скетча вы должны увидеть что-то вроде import processing.serial.*;. Магия! Под нашим выражением импорта надо объявить некоторые глобальные переменные. Это значит, что эти переменные мы сможем использовать в любой части нашего скетча. Добавьте эти две строки под выражением импорта:
Serial myPort; // создаем объект с серийного порта
class String val; // данные полученные с серийного порта
Для того, чтобы обеспечить прием данных с серийного порта, нам нужен объект (Serial object), который мы назвали myPort. Имя переменной не имеет значения, можете назвать его иначе. Нам также нужна переменная для получения данных в режиме онлайн. Так как с Arduino мы отсылаем данные типа String — строка, , нам надо получить строку и в Processing. В Arduino IDE есть методы setup( ) и loop( ). Аналогом в Processing являются setup() и draw()(вместо loop).
Для нашего метода setup() в Processing, нам надо найти серийный порт по которому подключен наш Arduino и настроить наш Serial объект для работы с этим портом.
// С учетом того, что на этом ПК (MAC) первый серийный порт в списке
// is Serial.list().
// На Windows это обычно COM1.
// откройте именно тот, порт, который вы используете
String portName = Serial.list(); //Измените 0 на 1 или 2 и т.д. и т.п. Главное, чтобы порт соответствовал вашему
myPort = new Serial(this, portName, 9600);
Помните как мы настраивали Serial.begin(9600) на Arduino? Что ж, если нам не нужны неполадки, о которых говорилось выше, в качестве последнего аргумента в нашем Serial объекте надо указать 9600. Таким образом, мы настраиваем одинаковую скорость передачи/приема данных в Arduino/Processing.
В цикле draw() мы контролируем указанный серийный порт. Как только на нем появляются данные, мы присваиваем их переменной val и выводим в окне консоли (черное поле под окном вашего скетча в Processing).
void draw() {
if ( myPort.available() > 0) { // если есть данные,
val = myPort.readStringUntil(‘\n’); // считываем их и записываем в переменную val
}
println(val); //отображаем данные в консоли
}
После нажатия кнопки ‘run’ (и если ваш Arduino подключен к ПК и на плату загружен скетч, который мы рассмотрели в предыдущем разделе), в окне под вашим скетчем появится надпись `Hello, World!‘. Эта строка будет появляться вновь и вновь (смотрите на рисунке ниже).
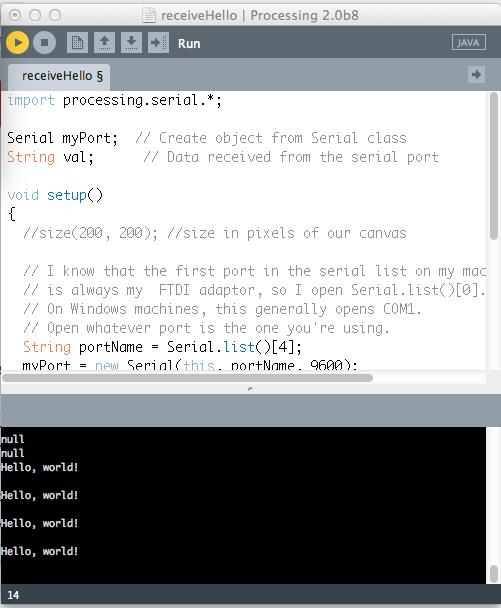
Отлично! Мы разобрались как передавать данные с Arduino в Processing. Наш следующий шаг — разобраться с противоположной операцией: передать данные из Processing в Arduino.
Что такое платежный метод?
Платежный метод – это то, чем расплачиваются потребители за товары или услуги онлайн. Банковские карты, электронные кошельки, мобильные платежи, мгновенные переводы и десятки других глобальных и региональных методов приема\отправки денег от покупателя продавцу – это тот набор инструментов, которым должен обладать каждый участник рынка e-commerce.
Процессинг платежей по всем этим методам обеспечивают платежные провайдеры. Они разрабатывают собственные платежные шлюзы и другие кастомизированные финтех-решения для удобного и безопасного приема средств онлайн через единую платформу.
Подробнее о том, чем занимается процессор платежей и чем это понятие отличается от «платежного шлюза», читайте тут.
Lights Camera
Lights
-
ambientLight()
Adds an ambient light
-
directionalLight()
Adds a directional light
-
lightFalloff()
Sets the falloff rates for point lights, spot lights, and ambient
lights -
lightSpecular()
Sets the specular color for lights
-
lights()
Sets the default ambient light, directional light, falloff, and specular
values -
noLights()
Disable all lighting
-
normal()
Sets the current normal vector
-
pointLight()
Adds a point light
-
spotLight()
Adds a spot light
Camera
-
beginCamera()
The beginCamera() and endCamera() functions enable
advanced customization of the camera space -
camera()
Sets the position of the camera
-
endCamera()
The beginCamera() and endCamera() functions enable
advanced customization of the camera space -
frustum()
Sets a perspective matrix defined through the parameters
-
ortho()
Sets an orthographic projection and defines a parallel clipping
volume -
perspective()
Sets a perspective projection applying foreshortening, making distant
objects appear smaller than closer ones -
printCamera()
Prints the current camera matrix to the Console (the text window at the
bottom of Processing) -
printProjection()
Prints the current projection matrix to the Console
Coordinates
-
modelX()
Returns the three-dimensional X, Y, Z position in model space
-
modelY()
Returns the three-dimensional X, Y, Z position in model space
-
modelZ()
Returns the three-dimensional X, Y, Z position in model space
-
screenX()
Takes a three-dimensional X, Y, Z position and returns the X value for
where it will appear on a (two-dimensional) screen -
screenY()
Takes a three-dimensional X, Y, Z position and returns the Y value for
where it will appear on a (two-dimensional) screen -
screenZ()
Takes a three-dimensional X, Y, Z position and returns the Z value for
where it will appear on a (two-dimensional) screen
Material Properties
-
ambient()
Sets the ambient reflectance for shapes drawn to the screen
-
emissive()
Sets the emissive color of the material used for drawing shapes drawn to
the screen -
shininess()
Sets the amount of gloss in the surface of shapes
-
specular()
Sets the specular color of the materials used for shapes drawn to the
screen, which sets the color of highlights
Camera
When looking at a 3D scene in a Processing window, we can think of our view of the scene as a camera. Zoom in closer to the objects and we can imagine a camera zooming in. Rotate around the scene and the camera rotates. Of course, there is no actual camera, this is just a convenient device to help us understand how to traverse a 3D scene. Simulating a camera can be done through clever transformations at the beginning of draw() by using translate(), rotate(), and scale() to manipulate our view of the scene. Nevertheless, for convenience there is also a camera() function whose purpose is also to simulate a camera. The function defines a camera as having an “eye position”, i.e. the camera location, a scene “center” which tells the camera which way to point, and an upward axis which aligns the camera vertically.The default camera position is essentially right between your eyes: a location out in front of the window aligned straight up and pointing towards the screen. Here are the numbers for the default position.
- Eye position: width/2, height/2, (height/2) / tan(PI/6)
- Scene center: width/2, height/2, 0
- Upwards axis: 0, 1, 0
When written in code, this looks like:
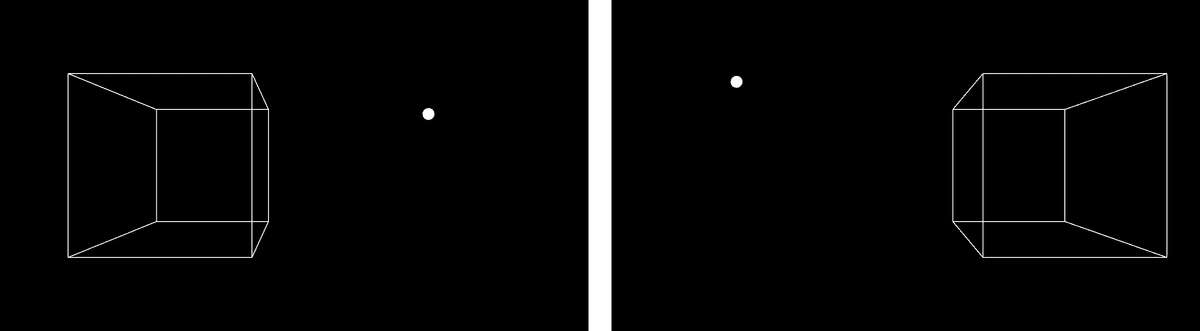
Any of the arguments in the camera() function can be made into a variable to simulate camera movements. For example, by moving the x position of the eye according to the mouse, you can rotate around an object to see it from a different angle.
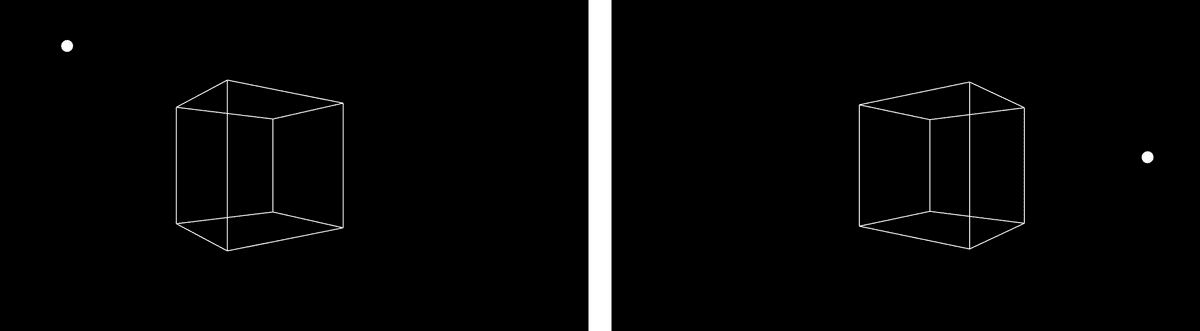
If you move both the eye position and the scene’s center according to the mouse, you can create the effect of panning.
Example 1: Web client
Processing’s Net library includes ready-made classes for both servers and clients. In order to fetch a page from the web, first one creates a client and connects to the address of the remote server. Using a simple call-and-response technique, the client requests the file and the file is returned by the server. This call-and-response is defined by a protocol called Hypertext Transfer Protocol (HTTP). HTTP consists of a handful of simple commands that are used to describe the state of the server and client, to request files, and to post data back to the server if necessary. The most basic HTTP command is . This command is similar to filling out a book request form in a library: the client requests a file by name, the server “gets” that file, and returns it to the client. HTTP also includes a number of response codes to indicate that the file was found successfully, or to indicate if any errors were encountered (for example, if the requested file doesn’t exist). The command means that the client is requesting the default file in the root web directory (/) and that the client is able to communicate using HTTP version 1.0. The trailing is the newline character, or roughly equivalent to hitting the return key. If the default file exists, the server transmits it back to the client.
Changes since alpha 6
A lot has changed! Trying to get everything in under the wire as we work to finalize 4.0.
Features and Updates
-
We’ve started work on refreshing the design. This round has a new set of colors, icons, a splash screen, and more. If you like them, great! If not, please hold your complaints. The internet doesn’t need more negativity! We still have a lot of work to do, and we think you’ll be happy with the final result.
-
It’s now possible to bundle sketches into a single file to be loaded inside the PDE. This is done with files, which is a sketch folder saved as a but with the extension changed to . This means you can post a sketch on the web as a , and someone with Processing can click the link and have it load directly in the PDE. #73, #3987
-
Similar to files, you can install Libraries, Modes, Tools, and Example sets (things that would normally be installed with the Contribution Manager) by renaming their file to . Double-clicking a file will open it with Processing, and ask the user whether they’d like to install it.
-
It’s now possible to do code completion and refactoring even when tabs are included in a sketch. Thanks Sam! #157, #230
-
Moved the preferences to on Linux instead of . This means your settings will be reset, but for most, that will be more of a plus with 4.x. #203
-
Initial update of the splash screen and icons. These still need some work: the icons are too muddy at smaller sizes, for instance.
-
The Welcome screen has been reset, so folks will see it again. We haven’t made a decision on the Welcome screen for the final 4.0, but plan for it to be more useful than what’s there now.
-
“Show Sketch Folder”, “Add File”, and “Export to Application” now require Untitled or Read-Only sketches to be saved first, which avoids a weird situation where the user is dealing with files in hidden temporary folders. #2459
-
The reference for Java Mode is now served up from a web server that lives inside the PDE. This means that the download has just a single file for the reference, instead of thousands of tiny files. Far fewer things to copy makes the installation process much smoother.
Bug Fixes
-
Really chatty console messages for longtime users who had older (like 2.x) settings files still on their machine.
-
IDE cursor position on Windows was going weird if display scaling used. #226
-
Only call if the Mode is using an Error Table (Python was not).
-
not working with when P2D renderer is used. #217, #225
Should Be Fixed
Several things that should no longer be a problem based on updates we’ve done in 4.x, but not necessarily verified 100%.
-
Undo feature may have undesired results (Fixed in 4.0a4) #4775
-
HiDPI support for GNOME desktop. #6059
-
AppKit errors from P2D/P3D. #5880
-
Export Application broken in Processing 3.5.4 when using P2D or P3D renderers. #5983
-
Cannot run within the class. #5770
-
error fixed with new JOGL release. #6160, #6154.
-
should also be fixed. #5476
Internal Changes
Things you’re unlikely to notice, but in case something seems off, it’s better to make note of them in case you see a related problem pop up.
-
Now using JDK 11.0.12+7.
-
Cleaning up handling and related code.
-
Removed code for pulling fonts from , because it no longer exists in Java 11.
-
Update to and add it to the code called by
-
Removed the JRE Downloader, because it’s no longer necessary. #155
-
Changed to .
Known Issues
-
Support for and is not yet complete on Linux. Please help! #239
-
Have I mentioned that the design of the icons, theme, layout, etc aren’t finished?
3D Shapes
Once you know how to translate and rotate around a three-dimensional coordinate system, you are ready to draw some three-dimensional shapes. You are probably quite comfortable with drawing shapes in 2D whether primitive (line(), rect(), ellipse(), triangle(), etc.) or custom (beginShape(), endShape(), and vertex()).
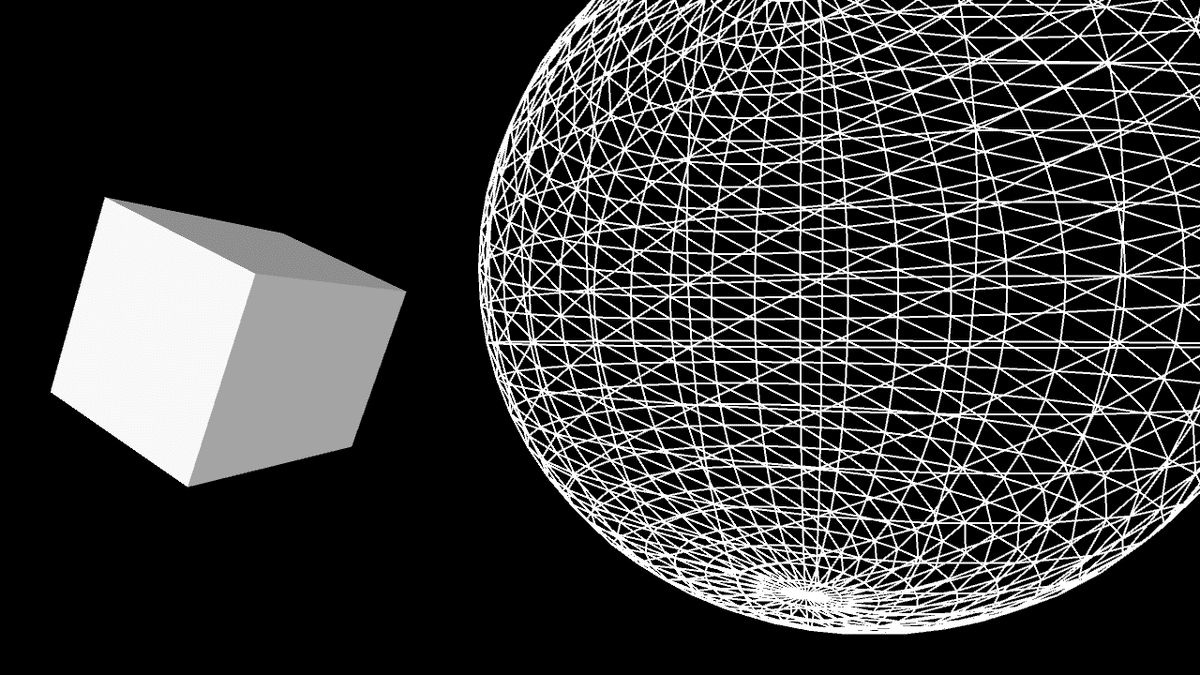
The good news is that shapes in 3D work pretty much the same way. There are primitive shapes that you get for free such as box() and sphere() as well as custom shapes you can make with calls to vertex().
See also: Primitives3D
In the above example, note that the functions box() and sphere() each only take one argument: size. These 3D shapes cannot be positioned via arguments, rather you should use the translate() and rotate() methods described previously.
Custom 3D shapes are drawn using beginShape(), endShape(), and vertex() by placing multiple polygons side by side. In 3D, the vertex() function takes 3 arguments: x, y, and z. Let’s say we want to draw a four-sided pyramid made up of four triangles, all connected to one point (the “apex”) and a flat plane (the “base”).
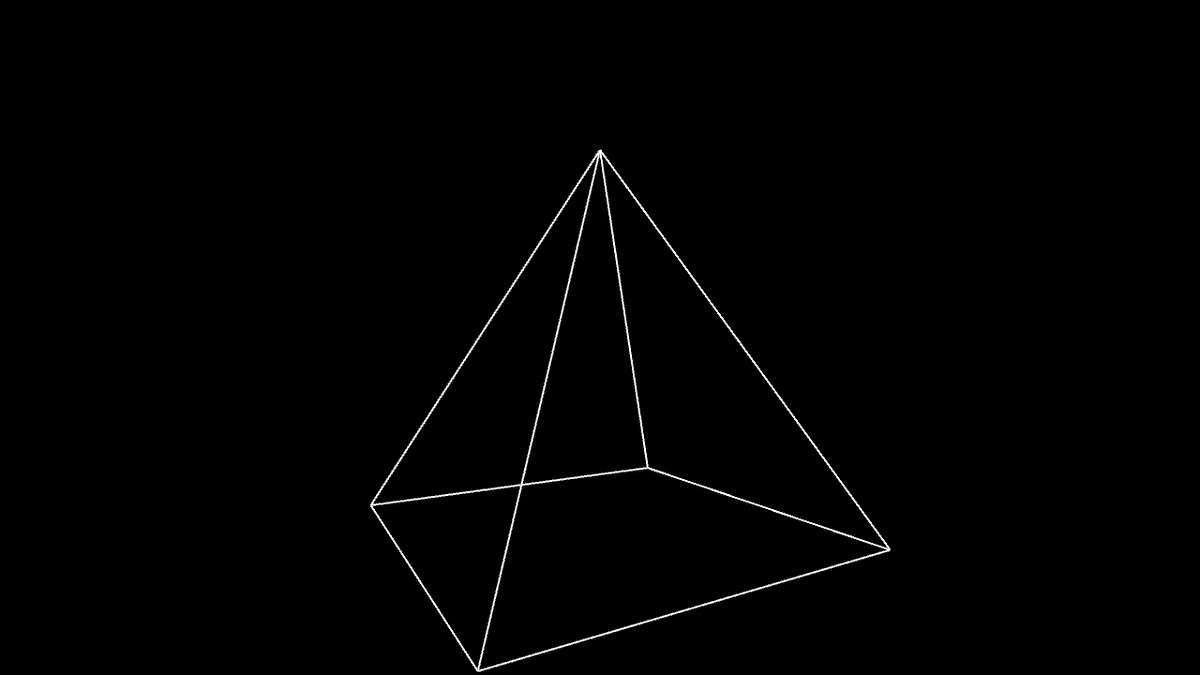
Note above how it’s often simpler to specify vertex locations using a standardized unit of measure (i.e. 1 pixel) and relative to a point of origin (0,0,0). The size and position of the shape is then set using matrix transformations: translate(), rotate(), and scale(). For some examples of more sophisticated custom shapes built in 3D, take a look at these examples: RGB Cube, Vertices, Toroid, Isocahedra.
Базовые примеры
Структуры и конструкции
- Операторы и комментарии
- Координаты
- Ширина и высота
- Применение функций setup() и draw()
- Применение функции noLoop()
- Применение функции loop()
- Применение функции redraw()
- Применение функций
- Рекурсия
- Применение функции createGraphics()
Фигуры
- Точки и линии
- Базовые фигуры
- Круговая диаграмма
- Создание многогранника
- Звезда
- Кольцо из треугольников
- Кривые Безье
Данные
- Переменные
- Целые числа и числа с плавающей точкой
- Значения true и false
- Символы и строки
- Масштаб переменных
- Преобразование типов данных
Работа с изображением
- Загрузка и показ изображений
- Фоновое изображение
- Прозрачность
- Маска прозрачности
- Применение функции createImage()
- Пуантилизм
- Применение функции requestImage()
Работа с цветом
- Цветовой тон
- Насыщенность
- Яркость
- Переменные для хранения цветовых значений
- Симультанный контраст
- Линейный градиент
- Радиальный градиент
Применение математических функций
- Инкрементирование и декрементирование
- Приоритет операторов
- Перемещение в 1 измерении
- Перемещение в 2 измерениях
- Применение функции map()
- Синус
- Синус и косинус
- Синусоида
- Суммарная синусоида
- Преобразование полярных координат в декартовы
- Арктангенс
- 2D-анимация на основе уравнения
- Линейная интерполяция
- Случайные числа
- Использование двух функций random()
- Распределение случайных значений по Гауссу
- Визуализация шума в 1D
- Визуализация шума в 2D
- Визуализация шума в 3D
- Волна на основе значений шума
Ввод
- Использование движения мыши по оси X
- Использование движения мыши по осям X и Y
- Использование нажатия на кнопку мыши
- Сигналы от мышки
- Плавная анимация
- Ограничительная рамка
- Сохранение входных данных
- Применение функций для работы с мышкой
- Клавиатура
- Применение функций для работы с клавиатурой
- Миллисекунды
- Часы
Руководства[4]
-
С чего начать
- Авторы – команда Processing
- Добро пожаловать в Processing for Android! Это руководство научит вас, как использовать режим программирования Android в Processing для запуска скетчей на устройстве Android или в эмуляторе.
-
Использование датчиков
- Авторы – команда Processing
- Это руководство объясняет основы считывания данных от датчиков при помощи Processing.
-
Разработка скетчей с помощью Android Studio
- Авторы – команда Processing
- Это руководство объясняет, как использовать среду разработки Android Studio для более продвинутой разработки скетчей при помощи основной библиотеки Processing.
-
Публикация приложений
- Авторы – команда Processing
- Это руководство рассказывает об этапах публикации скетча Processing в виде приложения в онлайн-магазине Google Play.
-
«Живые» обои
- Автор – Андрес Колабри
- Это руководство объясняет, как использовать режим программирования Android в PDE для разработки интерактивных «живых» обоев.
-
Циферблаты
- Автор – Андрес Колубри
- Это руководство объясняет, как использовать режим программирования Android в PDE для разработки интерактивных циферблатов.
-
Введение в VR
- Автор – Андрес Колубри
- Это руководство – введение в использование Google VR для написания при помощи Processing приложений для виртуальной реальности.
-
Месторасположение и разрешения
- Автор – Андрес Колубри
- Это руководство объясняет, как получить доступ к GPS-данным о месторасположении и правильно настроить разрешения скетча для устройств с операционной системой Android версии 6 и выше.
Internet concepts
Any machine connected to the Internet, be it client or server, is obligated to have an address. On the Internet, these addresses are called IP addresses and come in the form 123.45.67.89. (A new addressing standard is currently being rolled out that makes the addresses slightly longer.) Since IP addresses change from time to time and are difficult to remember, a system of natural-language shortcuts called the Domain Name System (DNS) allows IP addresses to be substituted by domain names such as “processing.org” or “google.com.” In a web address the word immediately preceding the domain name is the host name; for web servers it is customary to name the host machine “www” after the World Wide Web. But this is only customary. In fact, a web server’s host name can be most anything at all.
One of the main ways in which visual artists have used the Internet in their work is to conceive of the network as one giant database, an input stream that may be spidered, scanned, and parsed using automated clients. This is an artistic methodology that acknowledges the fundamental mutability of data (what programmers call “casting” a variable from one data type to another) and uses various data sources as input streams to power animations, to populate arrays of numbers with pseudo-random values, to track behavior, or quite simply for “content.” Lisa Jevbratt’s work 1:1 does this through the premise that every IP address might be represented by a single pixel. Her work scans the IP address namespace, number by number, pinging each address to determine whether a machine is online at that location. The results are visualized as pixels in a gigantic bitmap that, quite literally, represents the entire Internet (or at least all those machines with fixed IP addresses). In a very different way, Mark Napier’s two works Shredder and Digital Landfill rely on a seemingly endless influx of online data, rearranging and overlaying source material in ways unintended by the original creators. Works like Carnivore (more on this below) and Minitasking approach the network itself as a data source, the former tapping into real-time web traffic, and the latter tapping into real-time traffic on the Gnutella peer-to-peer network. Earlier works such as >I/O/D 4 (known as “The Webstalker”), or Jodi’s Wrongbrowser series of alternative web browsers also illustrate this approach, that the network itself is the art. All of these works automate the process of grabbing data from the Internet and manipulating it in some way. One of the most common types is a web client, a piece of software that automates the process of requesting and receiving remote files on the World Wide Web.
Режимы программирования
Processing имеет несколько разных режимов программирования, что позволяет создавать программы на разных языках и запускать их на разных платформах. Режим программирования по умолчанию – это режим Java. Другие режимы программирования (вроде Android Mode или Python Mode) можно добавить, кликнув на кнопку, находящуюся в правом верхнем углу PDE, и выбрав в открывшемся меню пункт «Add Mode…».
Режим Java
Этот режим позволяет писать короткие программы для отрисовки графики на экране, но также позволяет создавать сложные программы на языке Java. Им могут пользоваться новички, но он подойдет и для разработки профессиональных Java-программ. Скетчи, написанные в этом режиме, можно экспортировать в виде приложений Java, которые затем можно будет запускать на операционных системах Linux, Mac OS X и Windows.
Для опытных пользователей
К скетчу, создаваемому в режиме Java, могут быть подключены Java-файлы с расширением «*.java». Их можно создавать прямо в PDE или скопировать в папку скетча, нажав на Sketch > Add File… или просто перетащив нужный файл в текстовый редактор. В файлах с расширением «*.java» можно писать любой Java-код. Фактически, весь Java-код можно писать прямо в среде разработки Processing, сделав подкласс на основе PApplet. Примерно так:
public class MyDemo extends PApplet {
Эта техника предназначена только для опытных разработчиков, и мы использовать ее не рекомендуем. Использование этой техники означает, что ни одна дополнительная вкладка больше не будет вложенным классом, поэтому вам нужно будет дополнительно повозиться с тем, чтобы они корректно коммуницировали друг с другом при помощи PApplet. Если вы хотите воспользоваться дополнительным функционалом Java, использовать эту технику необязательно. Если вы опытный разработчик, которому нужны более продвинутые инструменты и средства для редактирования кода, вы можете создать скетч для Processing в другом редакторе языка Java. Файл «core.jar» Processing можно использовать в качестве части любого Java-проекта.
Libraries add new features
A library is a collection of code in a specified format that makes it easy to use within Processing. Libraries have been important to the growth of the project, because they let developers make new features accessible to users without needing to make them part of the core Processing API.
Several core libraries come with Processing. These can be seen in the Libraries section of the online reference (also available from the Help menu from within the PDE.) These libraries can be seen at http://processing.org/reference/libraries/.
One example is the PDF Export library. This library makes it possible to write PDF files directly from Processing. These vector graphics files can be scaled to any size and output at very high resolutions.
To use the PDF library in a project, choose Sketch → Import Library → pdf. This will add the following line to the top of the sketch:
Java programmers will recognize the command. In Processing, this line is also used to determine what code is packaged with a sketch when it is exported as an applet or application.
Now that the PDF library is imported, you may use it to create a file. For instance, the following line of code creates a new PDF file named lines.pdf that you can draw to.
Each drawing function such as and will now draw to the screen as well as to the PDF.
Other libraries provide features such as reading images from a camera, sending and receiving MIDI and OSC commands, sophisticated 3D camera control, and access to MySQL databases.
Don’t start by trying to build a cathedral
If you’re already familiar with programming, it’s important to understand how Processing differs from other development environments and languages. The Processing project encourages a style of work that builds code quickly, understanding that either the code will be used as a quick sketch, or ideas are being tested before developing a final project. This could be misconstrued as software engineering heresy. Perhaps we’re not far from “hacking,” but this is more appropriate for the roles in which Processing is used. Why force students or casual programmers to learn about graphics contexts, threading, and event handling functions before they can show something on the screen that interacts with the mouse? The same goes for advanced developers: why should they always need to start with the same two pages of code whenever they begin a project?
In another scenario, the ability to try things out quickly is a far higher priority than sophisticated code structure. Usually you don’t know what the outcome will be, so you might build something one week to try an initial hypothesis, and build something new the next based on what was learned in the first week. To this end, remember the following considerations as you begin writing code with Processing:
- Be careful about creating unnecessary structures in your code. As you learn
about encapsulating your code into classes, it’s tempting to make ever-smaller
classes, because data can always be distilled further. Do you need classes at
the level of molecules, atoms, or quarks? Just because atoms go smaller
doesn’t mean that we need to work at a lower level of abstraction. If a class
is half a page, does it make sense to have six additional subclasses that are
each half a page long? Could the same thing be accomplished with a single
class that is a page and a half in total? - Consider the scale of the project. It’s not always necessary to build
enterprise-level software on the first day. Explore first: figure out the
minimum code necessary to help answer your questions and satisfy your
curiosity.
The argument is not to avoid continually rewriting, but rather to delay engineering work until it’s appropriate. The threshold for where to begin engineering a piece of software is much later than for traditional programming projects because there is a kind of art to the early process of quick iteration.
Of course, once things are working, avoid the urge to rewrite for its own sake. A rewrite should be used when addressing a completely different problem. If you’ve managed to hit the nail on the head, you should refactor to clean up function names and class interactions. But a full rewrite of already finished code is almost always a bad idea, no matter how «ugly» it may seem.
Core
-
Create DXF files to save geometry for loading into other programs. It works with triangle-based graphics including polygons, boxes, and spheres.
-
Access peripherals on the Raspberry Pi and other Linux-based computers
-
Send and receive data over the Internet through simple clients and servers.
-
Create PDF files. These vector graphics files can be scaled to any size and printed at high resolutions.
-
Send data between Processing and external hardware through serial communication (RS-232).
-
Playback audio files, audio input, synthesize sound, and effects.
-
Create SVG files.
-
Read images from a camera, play movie files, and create movies.
Color
Setting
-
background()
Sets the color used for the background of the Processing window
-
clear()
Clears the pixels within a buffer
-
colorMode()
Changes the way Processing interprets color data
-
fill()
Sets the color used to fill shapes
-
noFill()
Disables filling geometry
-
noStroke()
Disables drawing the stroke (outline)
-
stroke()
Sets the color used to draw lines and borders around shapes
Creating & Reading
-
alpha()
Extracts the alpha value from a color
-
blue()
Extracts the blue value from a color, scaled to match current
colorMode() -
brightness()
Extracts the brightness value from a color
-
color()
Creates colors for storing in variables of the color
datatype -
green()
Extracts the green value from a color, scaled to match current
colorMode() -
hue()
Extracts the hue value from a color
-
lerpColor()
Calculates a color or colors between two colors at a specific
increment -
red()
Extracts the red value from a color, scaled to match current
colorMode() -
saturation()
Extracts the saturation value from a color
Control
Relational Operators
-
== (equality)
Determines if two values are equivalent
-
> (greater than)
Tests if the value on the left is larger than the value on the right
-
>= (greater than or equal to)
Tests if the value on the left is larger than the value on the right or if the values are equivalent
-
!= (inequality)
Determines if one expression is not equivalent to another
-
< (less than)
Tests if the value on the left is smaller than the value on the right
-
<= (less than or equal to)
Tests if the value on the left is less than the value on the right or if the values are equivalent
Conditionals
-
break
Ends the execution of a structure such as switch, for, or while and jumps to the next statement after
-
case
Denotes the different names to be evaluated with the parameter in the switch structure
-
?: (conditional)
A shortcut for writing an if and else structure
-
continue
When run inside of a for or while, it skips the remainder of the block and starts the next iteration
-
default
Keyword for defining the default condition of a switch
-
else
Extends the if structure allowing the program to choose between two or more blocks of code
-
if
Allows the program to make a decision about which code to execute
-
switch
Works like an if else structure, but switch is more convenient when you need to select between three or more alternatives
Logical Operators
-
&& (logical AND)
Compares two expressions and returns true only if both evaluate to true
-
! (logical NOT)
Inverts the Boolean value of an expression
-
|| (logical OR)
Compares two expressions and returns true if one or both evaluate to true
Похожие записи:
 Нормы освещенности рабочих мест и производственных помещений
 Коэффициент использования светового потока уличных led-светильников
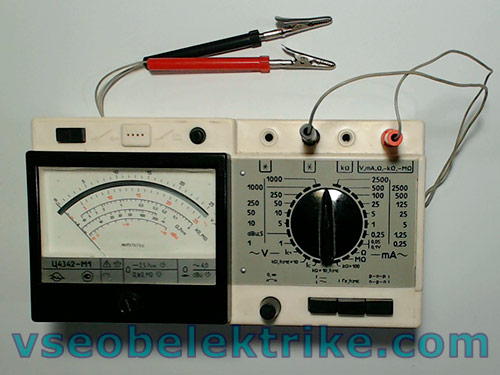 Как пользоваться мультиметром: инструкция для новичков
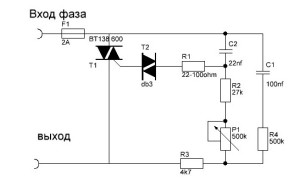 Что такое диммер и как он работает
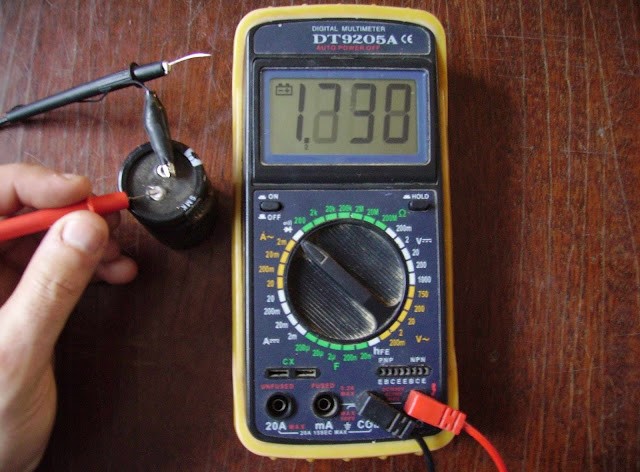 Проверка аккумулятора мультиметром
 Полная, активная и реактивная мощность переменного тока